D10


How to set Extended Mode in Dual Monitor and set the Touch Panel in correct resolution?
2008/09/03
A. Click the icon of “Intel Onboard VGA Utility”in system bar, and select “Graphics Properties…”.
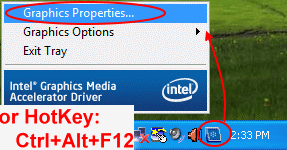
If you are using Windows Vista, please see B item, but if you are using Windows XP, please jump to C item.
B. Setting with Windows Vista:
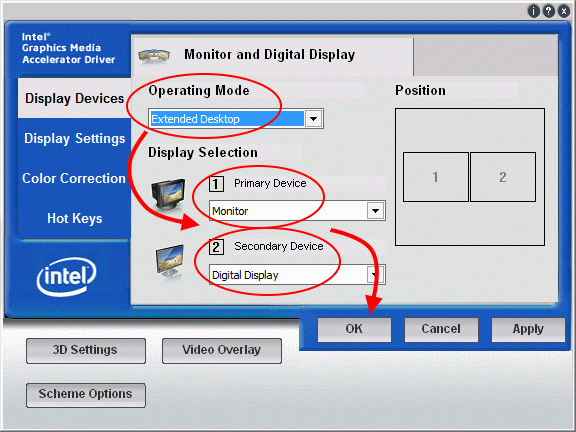
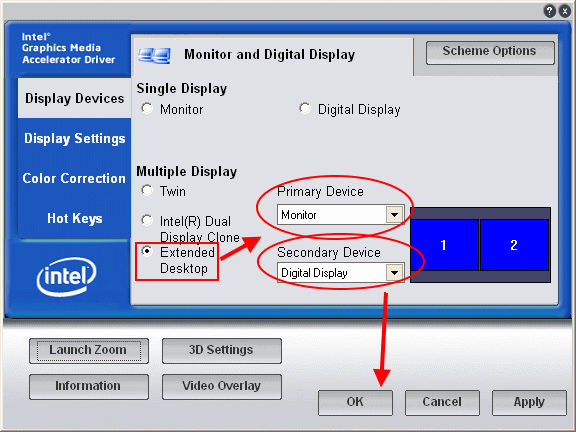
B1. Please check the below picture, select “Extended Desktop” and let Primary Device to be “Monitor”, Secondary Device to be “Digital Display”, then, press OK.
B. Setting with Windows Vista:
B1. Please check the below picture, select “Extended Desktop” and let Primary Device to be “Monitor”, Secondary Device to be “Digital Display”, then, press OK.
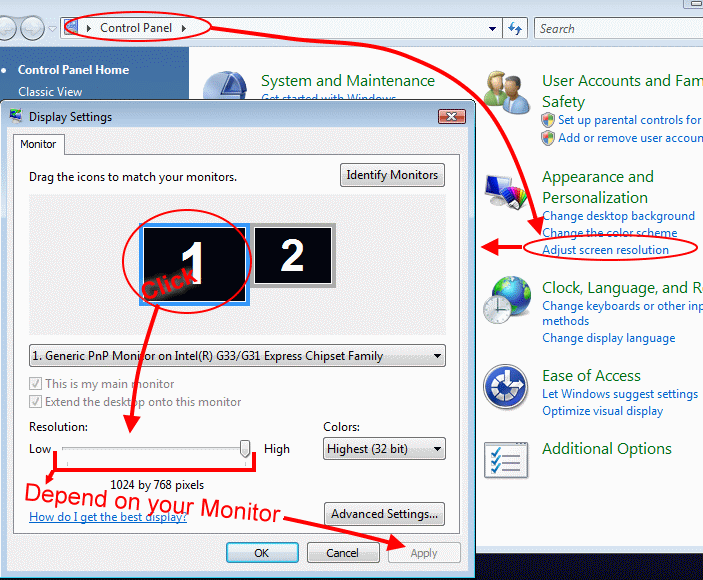
B2. Open “Control Panel” -> “Adjust screen resolution”->Select the No.1 square->Change the resolution of your Monitor->Apply.
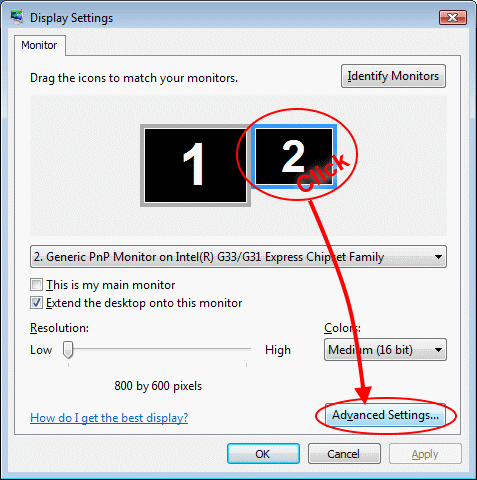
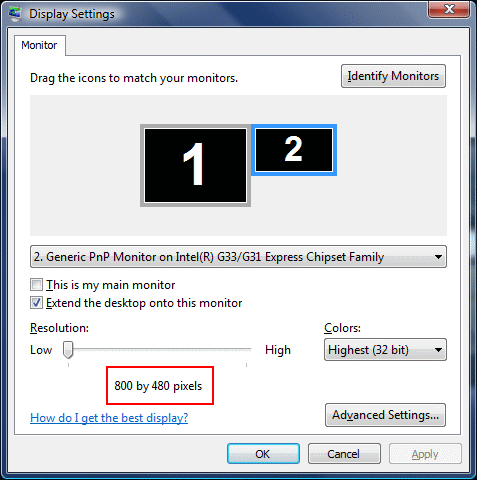
B3. Select No.2 square->Press “Advanced Settings…”.
B4. Select “Adapter” Column->”List All Modes…”->”800 by 480, True Color(32bit), 66 Hertz”->OK.

Then press ” Yes” in below windows.
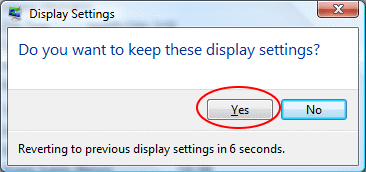
B5. Press OK in “Display Settings”window, then the setting is finished.
C. Setting with Windows XP:
C1. Check the “Extended Desktop” and select “Monitor” with Primary Device, “Digital Display” with Secondary Device.
C1. Check the “Extended Desktop” and select “Monitor” with Primary Device, “Digital Display” with Secondary Device.
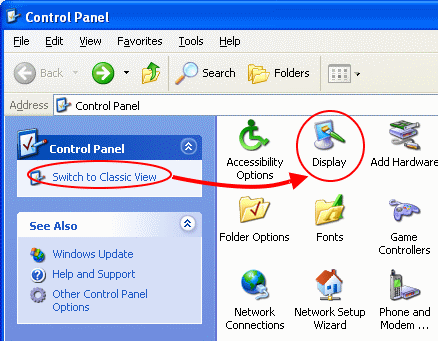
C2. “Control Panel”->”Switch to Classic View”->”Display”.
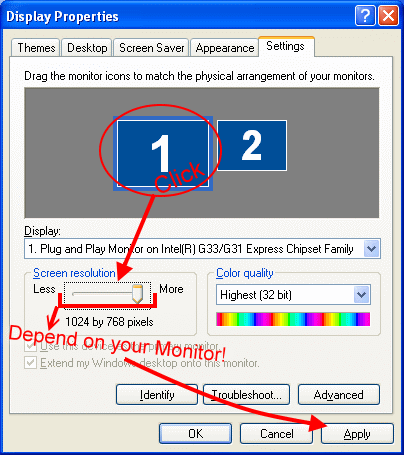
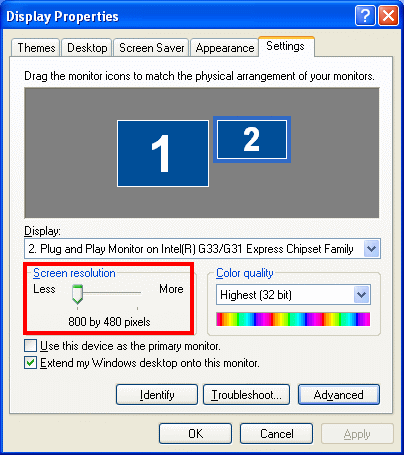
C3. Select the No.1 square->Change the resolution of your monitor->Apply.
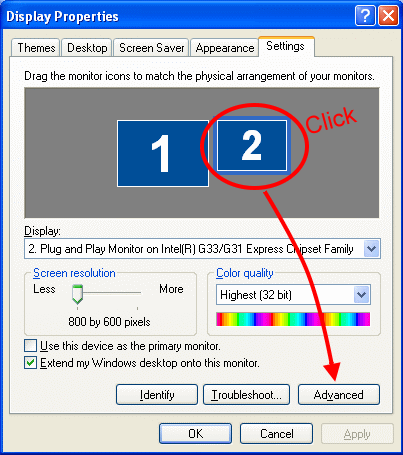
C4. Select the No.2 square->”Advanced”.
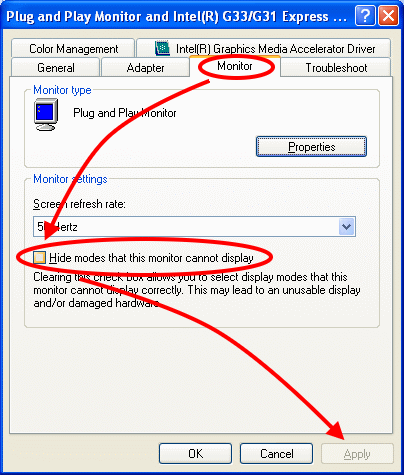
C5. Select “Monitor” column->uncheck the “Hide modes that this monitor cannot display”->Apply.
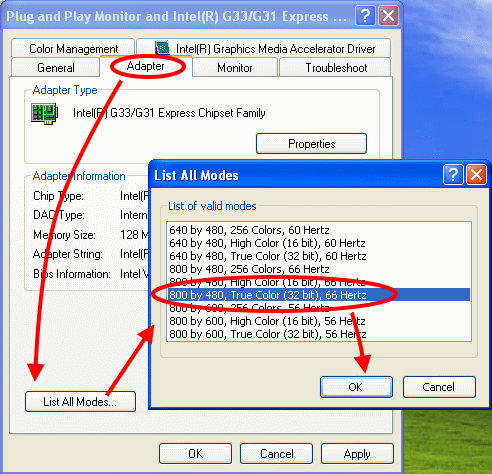
C6. Select “Adapter” column->”List All Modes…”->”800 by 480, True Color(32bit), 66 Hertz”->OK.
C7. Press OK in “Display Properties” window then the setting is finished.
Service Center Info
Hot Line : 886-2-8792-6168Hours : Monday through Friday 09:00 to 12:00
13:00 to 18:00 Taiwan Time (GMT+8)
E-mail : Tech Support Form
